How to Setup Parameters for the Wall Type Schedules

Hello, wonderful readers! Today we're diving into a very engaging topic: setting up specific parameters for wall types in Autodesk Revit, using our incredibly helpful software application, Wall Type Schedule. This will allow you to get a detailed wall type description seamlessly. If you missed our basic tutorial on creating wall type schedules, don't fret! You can catch up [here].
Why Are These Parameters Important?
Knowing the maximum height, sound class, fire class, and distance between the stud centres of a wall is not just an architectural necessity; it's a safety and quality assurance standard, especially in the European construction scene. By specifying these values, you can ensure that your wall designs meet the necessary requirements and specifications for your projects.
Chapter 1: Creating the Revit Parameters for Wall Type Schedules
1. Launch Autodesk Revit.
2. Navigate to the Manage tab.
3. Select Project Parameters. This opens the Project Parameters dialog box.
4. Click Add to create a new parameter.
5. Set "Type of Parameter" to Number.
6. Name the parameter. Start with Maximum Height.
7. Under Categories, select Wall. Ensure no other category is selected.
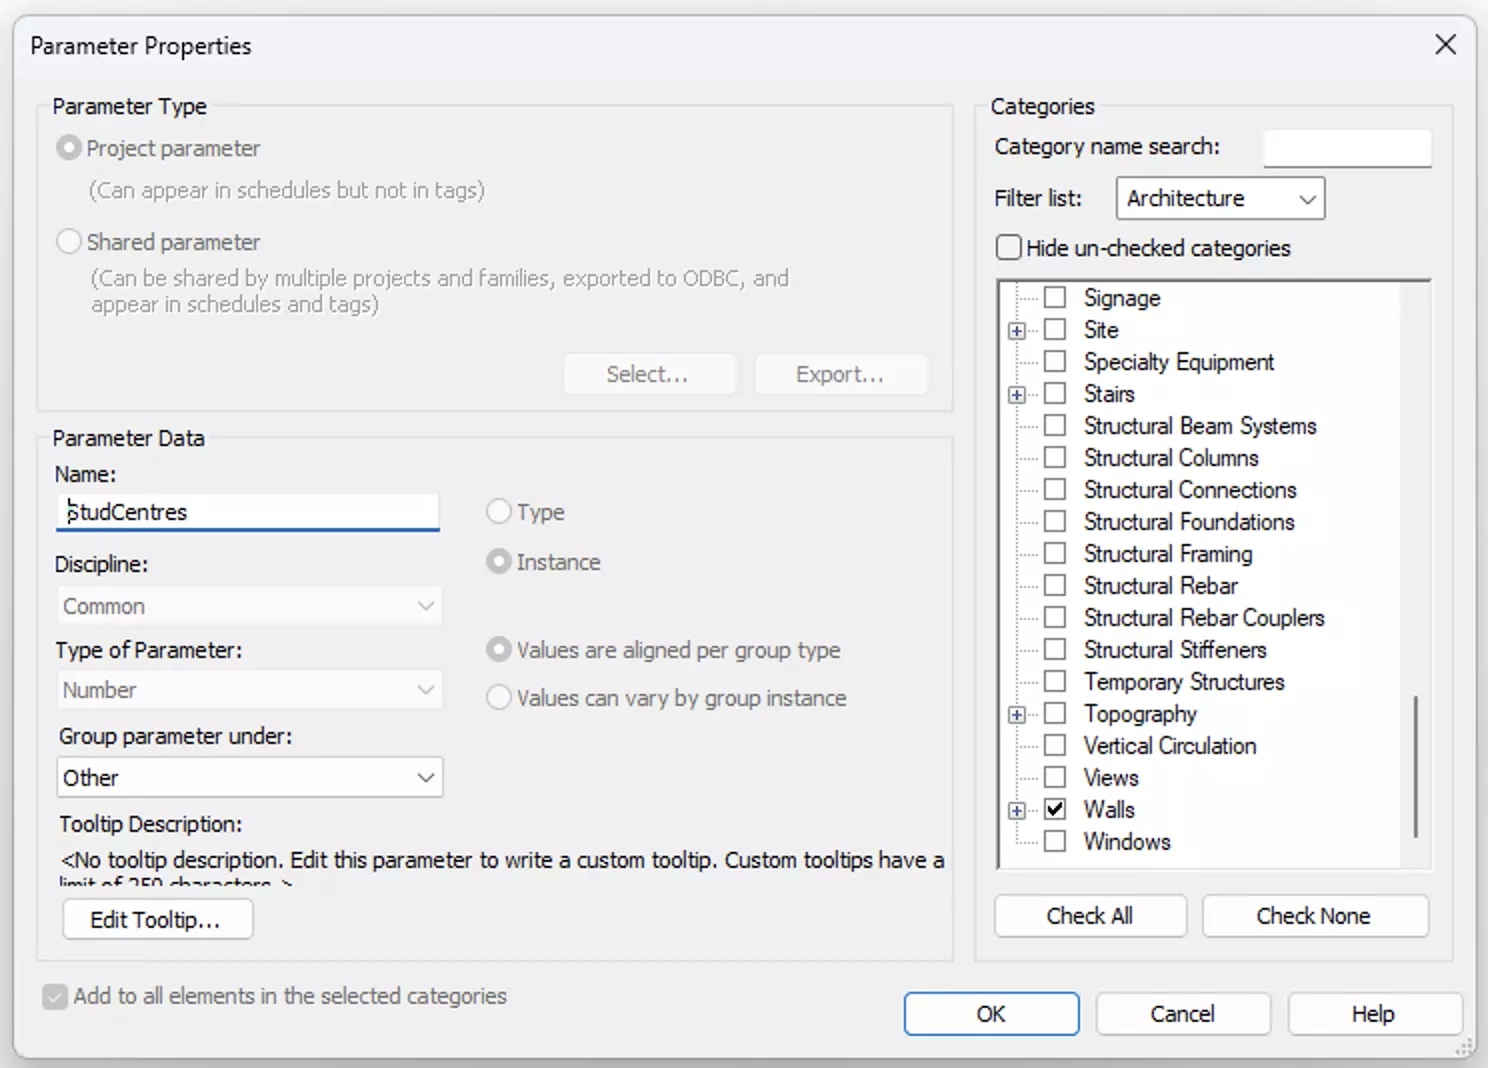
8. Click OK.
9. Repeat the above steps for the other parameters: Sound Class, Fire Class, and Distance Between Stud Centres.
Great job! You've now successfully set up the required parameters in Revit.
Chapter 2: Setting up the Parameters on the Wall Type Schedule Application
1. Launch the Wall Type Schedule application.
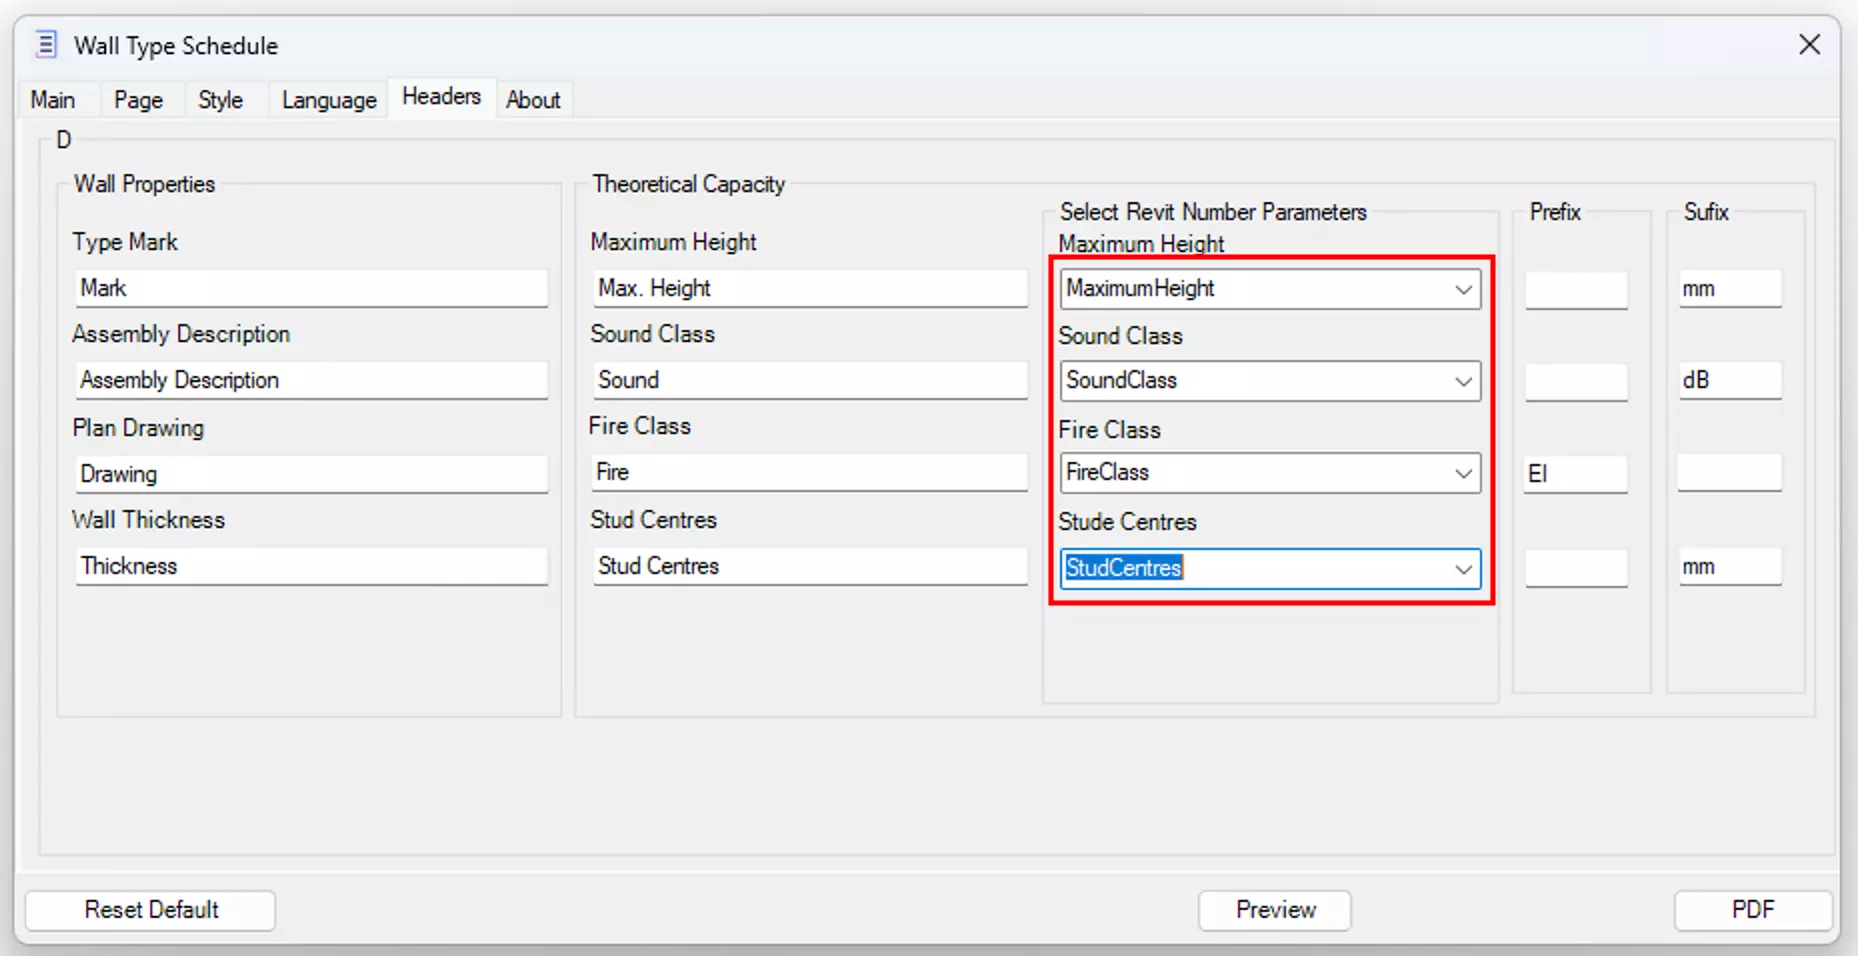
2. Go to the Headers tab.
3. Find the dropdown controls. You should see four of them.
4. For the first dropdown, select the Maximum Height parameter you just created in Revit.
5. Proceed similarly for the other parameters: Sound Class, Fire Class, and Distance Between Stud Centres.
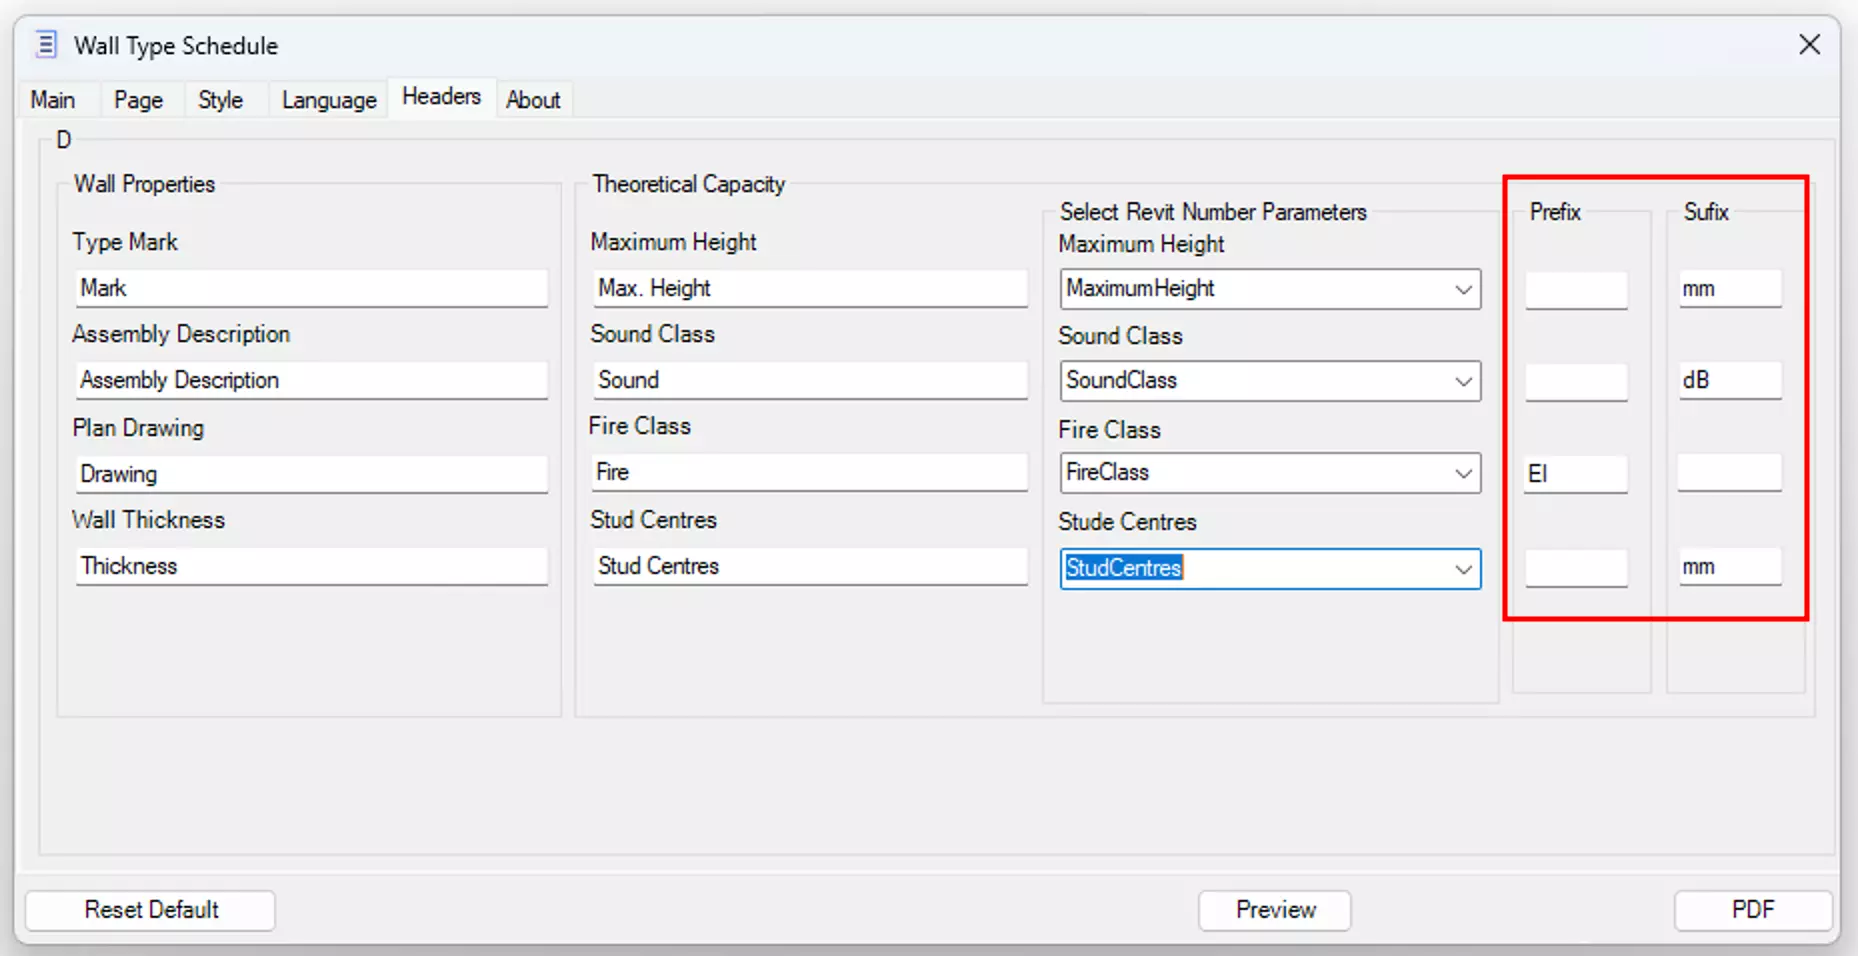
6. (Optional) Add a Prefix or Suffix to each parameter. This is particularly handy if you want to adapt the nomenclature to your region or language.
By now, your Wall Type Schedule application is perfectly set to collaborate with Revit and extract the required wall data!
Chapter 3: Inserting the Wall Type Values on Your Project
1. In Revit, go to the View tab.
2. Select Schedules > Schedule/Quantities.
3. In the New Schedule dialog, for "Category", choose Wall.
4. Name it "Wall Schedule".
5. Under "Available Fields", select and add the four parameters we created: Type, Type Mark, Maximum Height, Sound Class, Fire Class, and Distance Between Stud Centres.
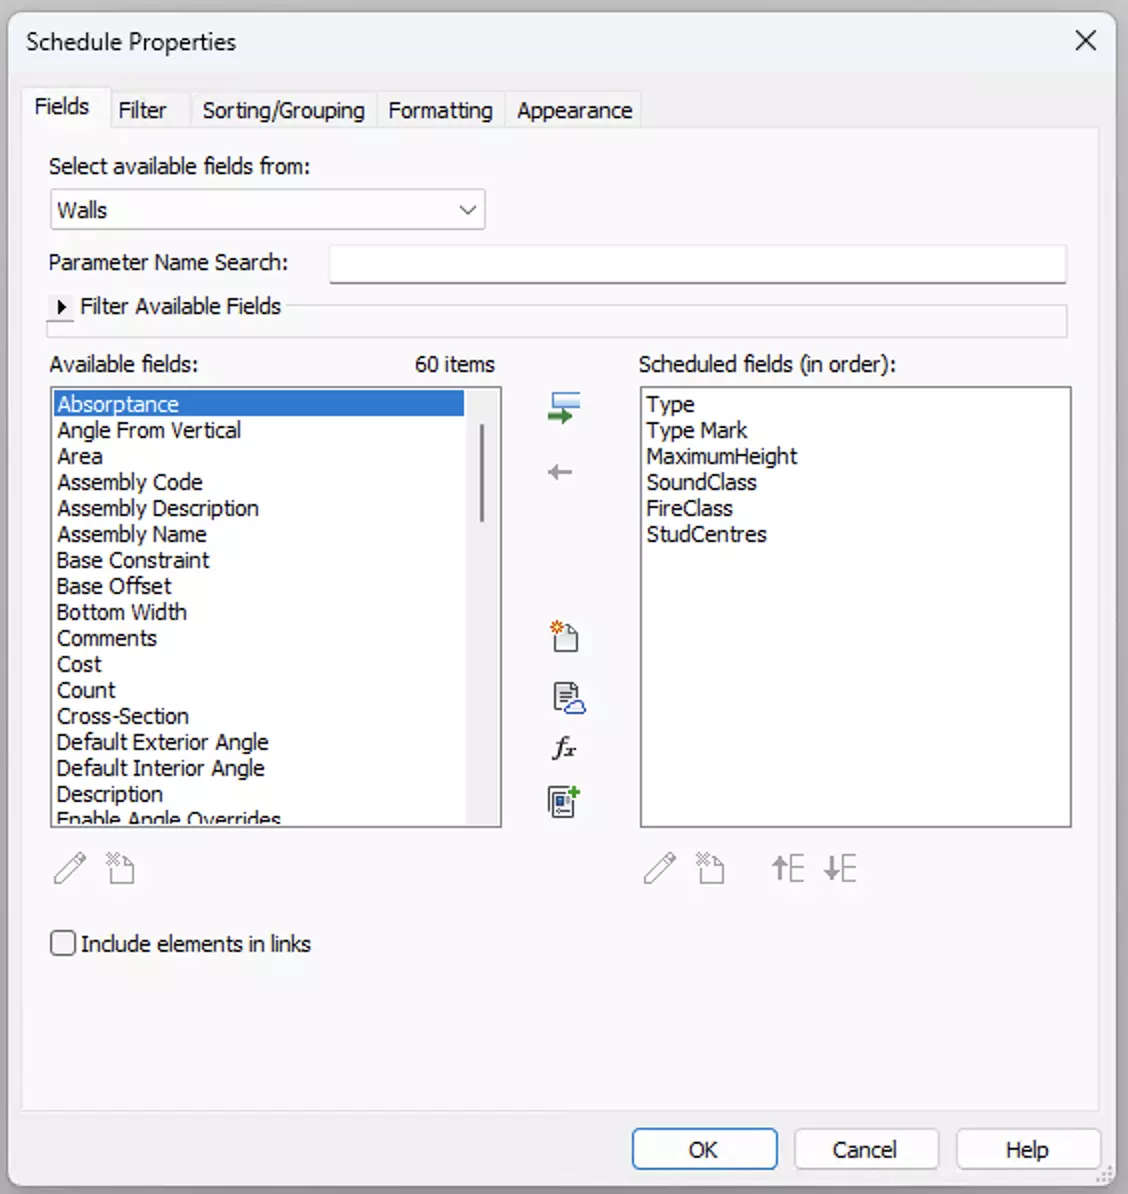
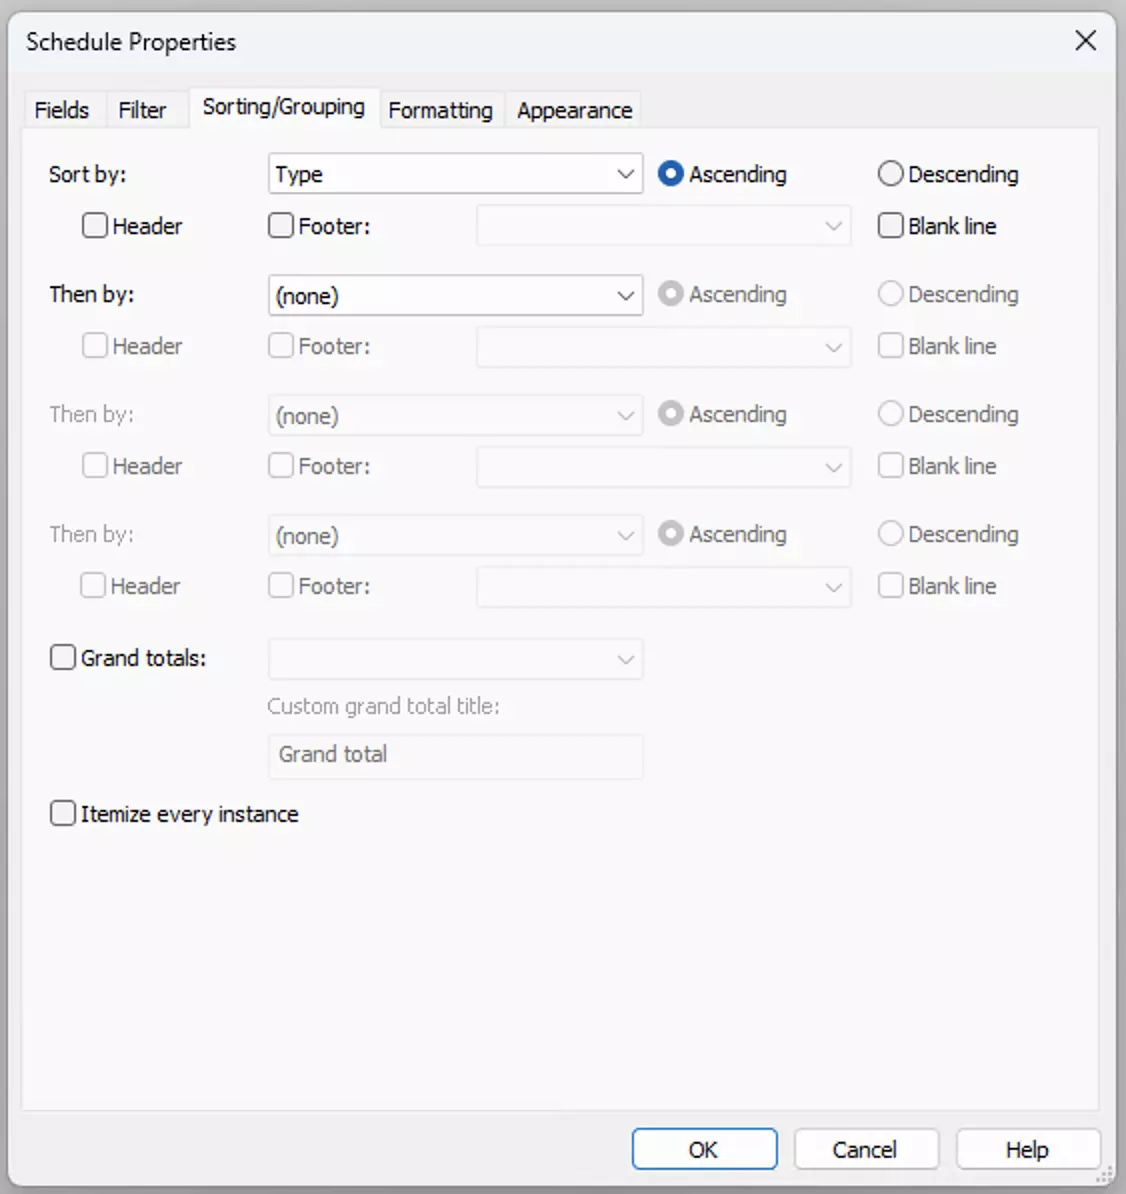
6. Set up the desired display order, grouping, and formatting.
7. Click OK to create the schedule.
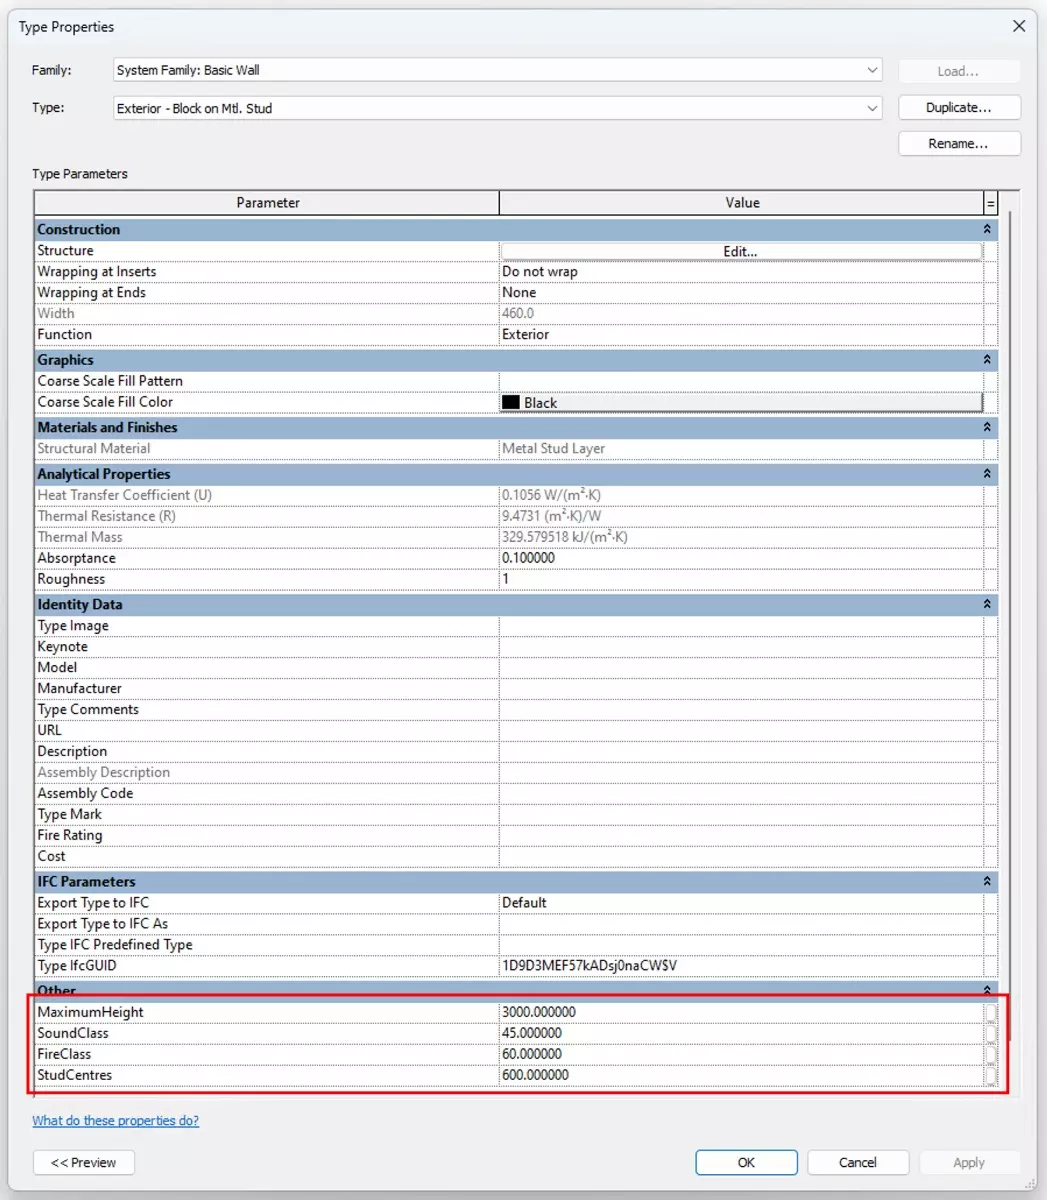
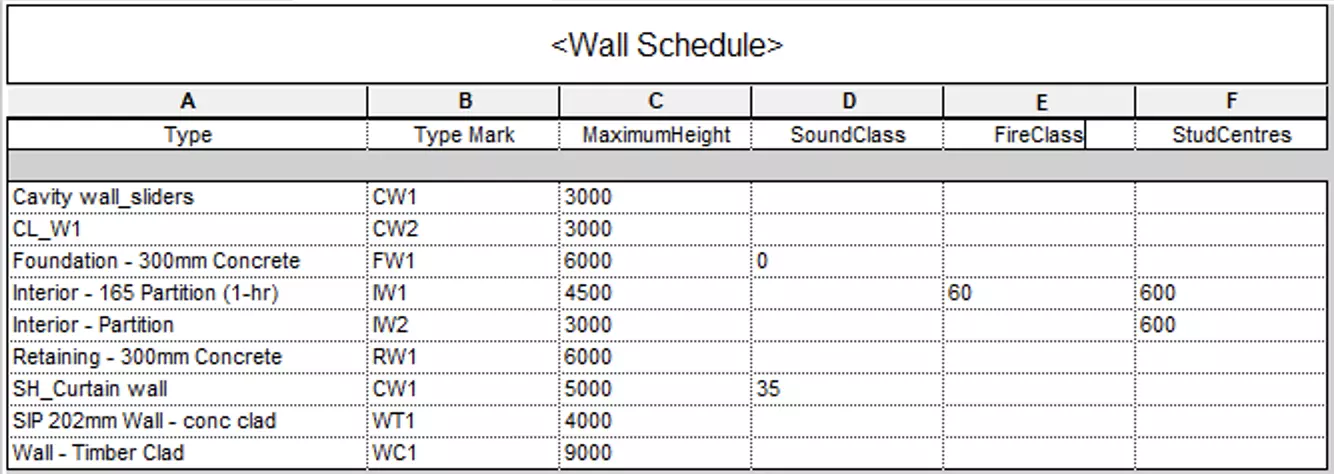
8. Now, you can input values for each wall type in this schedule!
Conclusion
Voilà! You've mastered the art of setting up wall type schedules in Revit with specific parameters. With these parameters in place, creating wall type schedules with our Revit plugin has never been easier. For those looking to streamline their process even further, consider utilizing shared parameters and starting with a pre-populated wall library. Great news – we've already published an article that provides a comprehensive wall partition library for your convenience. Totally free. Check it out [here].
If you're seeking an even more efficient way to publish your wall type schedules, give our software plugin a try: "Wall Type Schedule for Autodesk Revit". With this tool, publishing becomes fully automated and consistently easy. Dive in and experience the convenience with our 7-day free trial.
Keep designing, keep innovating!

