How to Export Schedules to Excel in Autodesk Revit

Welcome back to our weekly blog tutorials! Today, we have something special for all our architect and engineer friends out there. We're going to dive into an essential workflow that can dramatically streamline your work process and maximize your productivity - exporting schedules from Autodesk Revit to Excel using our proprietary application, 'Reports'.
As most of you are well aware, Excel is far from being obsolete in the building industry; quite the contrary. Excel continues to be a formidable tool, aiding in organizing, analyzing and sharing project data in a versatile, user-friendly format. It excels (pun intended!) at handling long, multi-page documents, with page numbering and pre-set page sizes, all at your fingertips.
And this is where 'Reports' steps in to fill the gap. Autodesk Revit, in its native form, does not support a direct export of schedules to Excel. The conventional method involves exporting schedules into CSV files and then importing them into Excel, adding more steps and manual work. Enter 'Reports', your solution for a virtually one-click operation, shaving off time and reducing room for error.
Chapter 1: How to Export a Revit Schedule to Excel
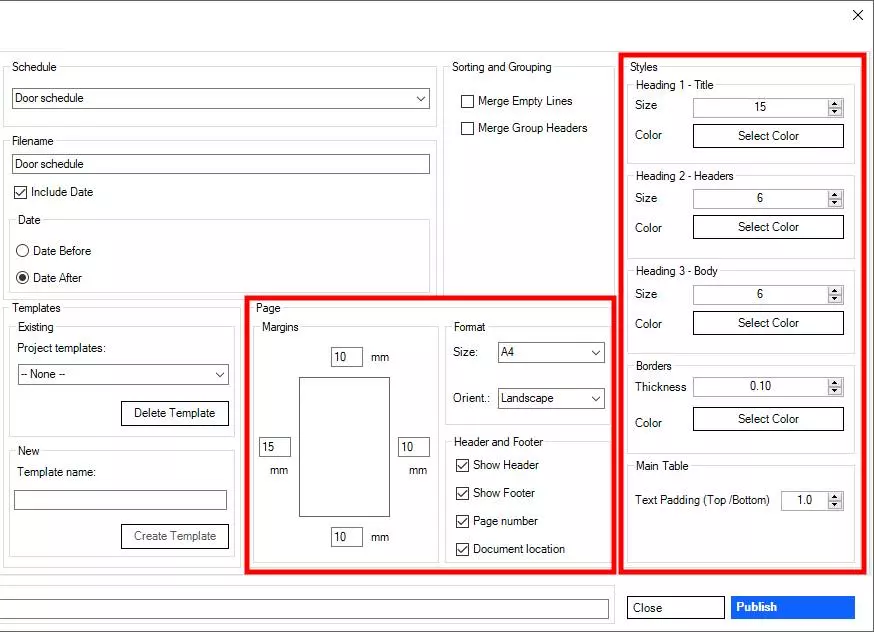
'Reports' takes the crown with its ability to intelligently detect schedule contents and choose the appropriate size. It's also been designed to remember your preferences. All settings, including page size, fonts, and even your company logo, are saved and can be shared among all project users. The ease of re-exporting Revit schedules just went up several notches!
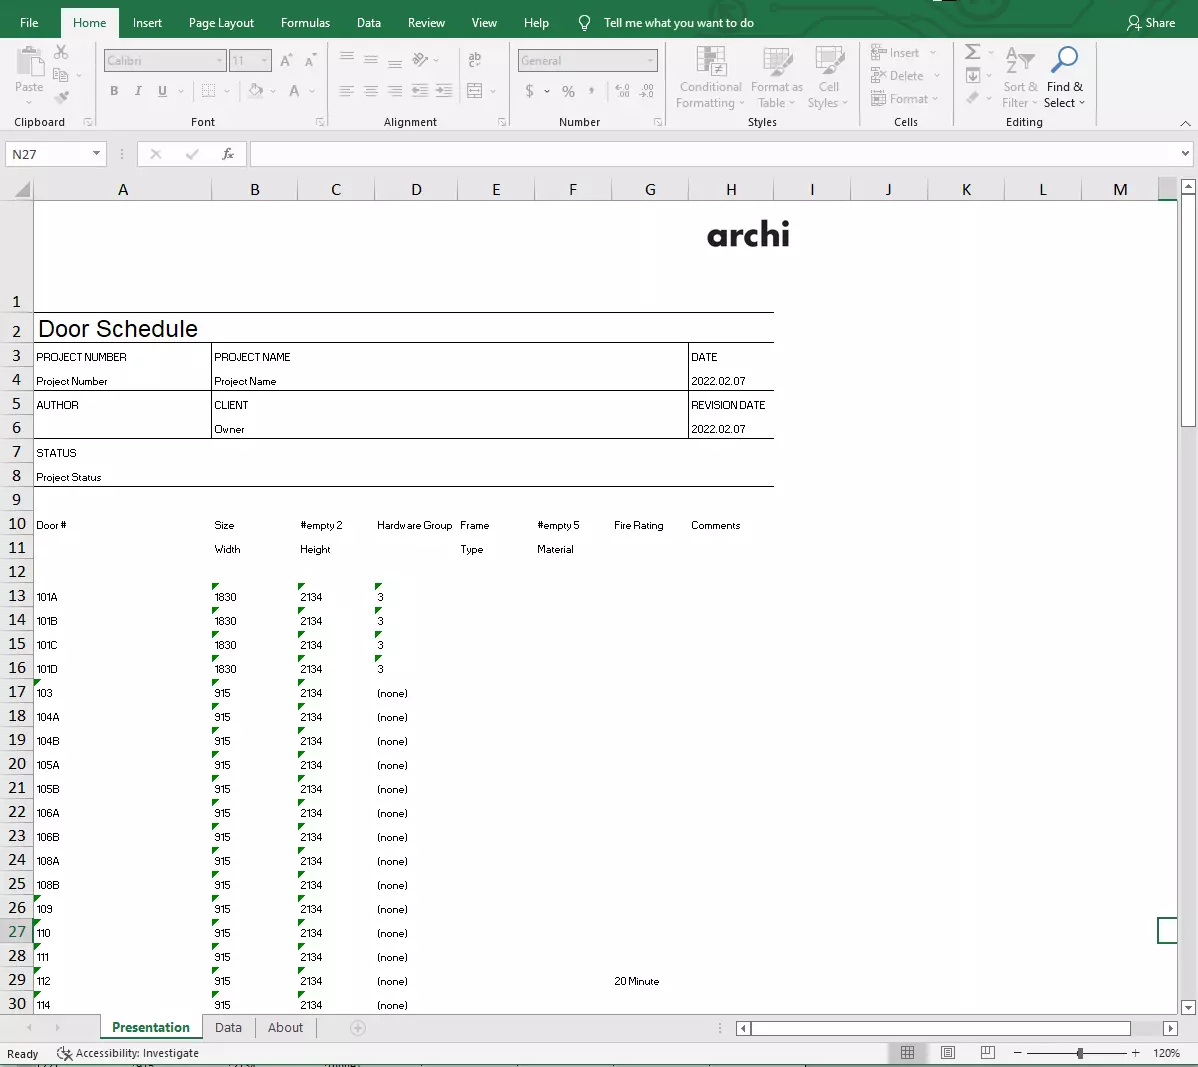
When you use 'Reports', it exports your schedule into two different document tabs in Excel - one tab keeps the presentation format, much like a PDF report, while the other is a simple, unformatted spreadsheet. The balance of aesthetics and utility is simply unparalleled.
So, how does it work? The steps are easy:
1. Open 'Reports'.
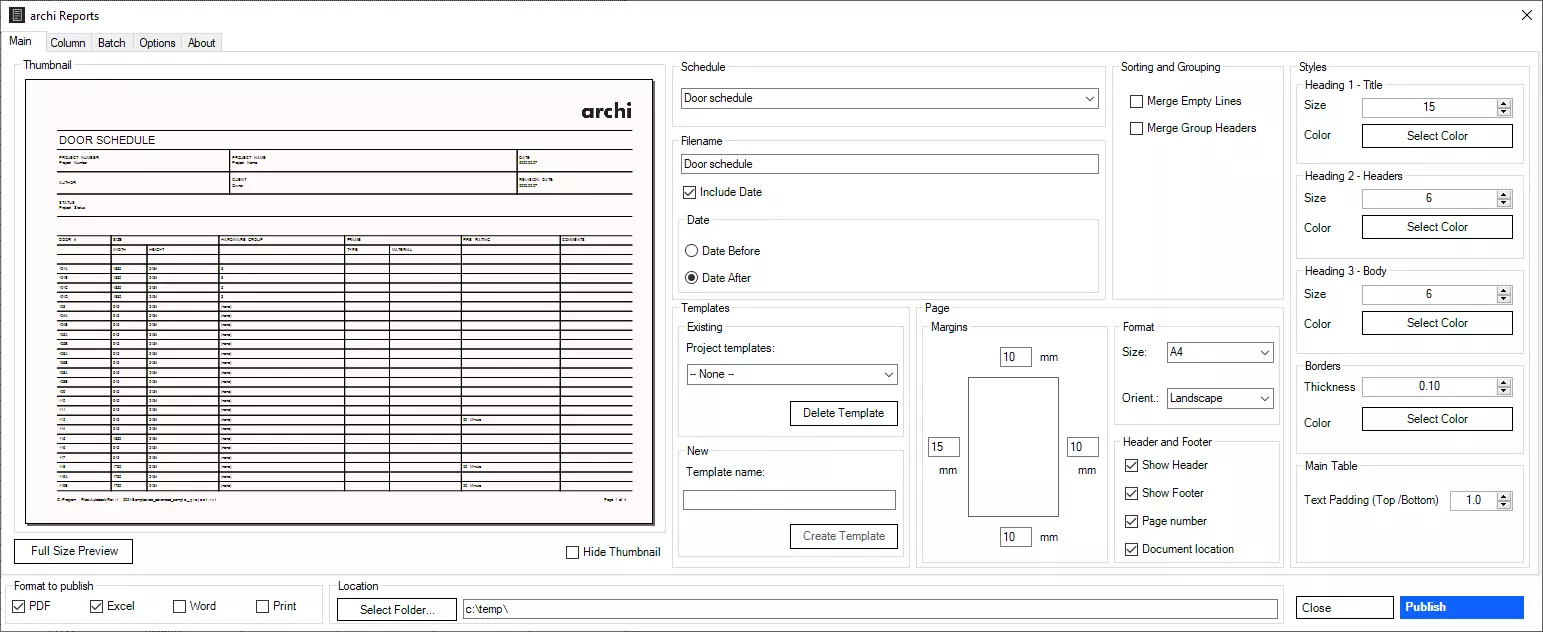
2. Select the schedule you want to export.
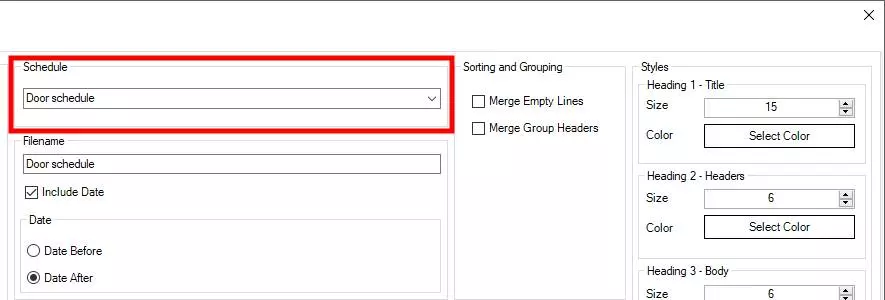
3. Make any necessary changes to page size, orientation, and fonts.
4. Press the 'Publish' button to export to Excel.
You can even use the preview window to get a full-page preview before the final export. The process is designed to be intuitive and effortless.
In conclusion, the benefits of integrating 'Reports' into your workflow are crystal clear. With its ability to export schedules directly to Excel, and the significant reduction in manual tasks and time spent on re-exports, 'Reports' elevates your workflow to the next level. The application creates an efficient, smooth-running, and overall more enjoyable work experience.
Stay tuned for our next tutorial, and remember - keep designing, keep improving, and keep aiming high. Your tools are your allies, and we're here to make sure you have the best ones at your disposal.

