How to Use an Eyedropper in Autodesk Revit

Introduction
Hello, Revit enthusiasts! We're back with another tutorial, and this time we're going to explore a handy tool that could seriously ramp up your design game - the 'Color Eyedropper'. Now, you may know this tool by other names like 'Color Picker', 'Color Sampler', or 'Color Selector'. Regardless of the name, it's an indispensable tool that Autodesk Revit doesn't natively support. But fret not, that's where the powerful Graphic Studio steps in!
Understanding and using the color eyedropper can add another layer of professionalism to your designs. This tool lets you precisely match and select colors, which could be a game changer when you're aiming for consistency across your project. You're not just limited to your existing project; you can even pick colors from other applications or documents like PDFs or images. So, let's roll up our sleeves and get started!
Chapter 1 - How to Use the Eyedropper in Revit
With the color eyedropper, you can effortlessly override colors of lines and surfaces, creating a cohesive color palette across your design elements. Here's how to do it:
1. Install Graphic Studio: To start, ensure you have Graphic Studio installed. This software is a fantastic extension to Revit's capabilities and, of course, it gives you access to the handy color eyedropper tool.
2. Open Your Revit Project: Open your Revit project where you want to apply color changes and lauch Graphic Studio.
3. Select Elements in Revit View: Before you can change colors, you need to select the elements in your Revit view that you want to alter.
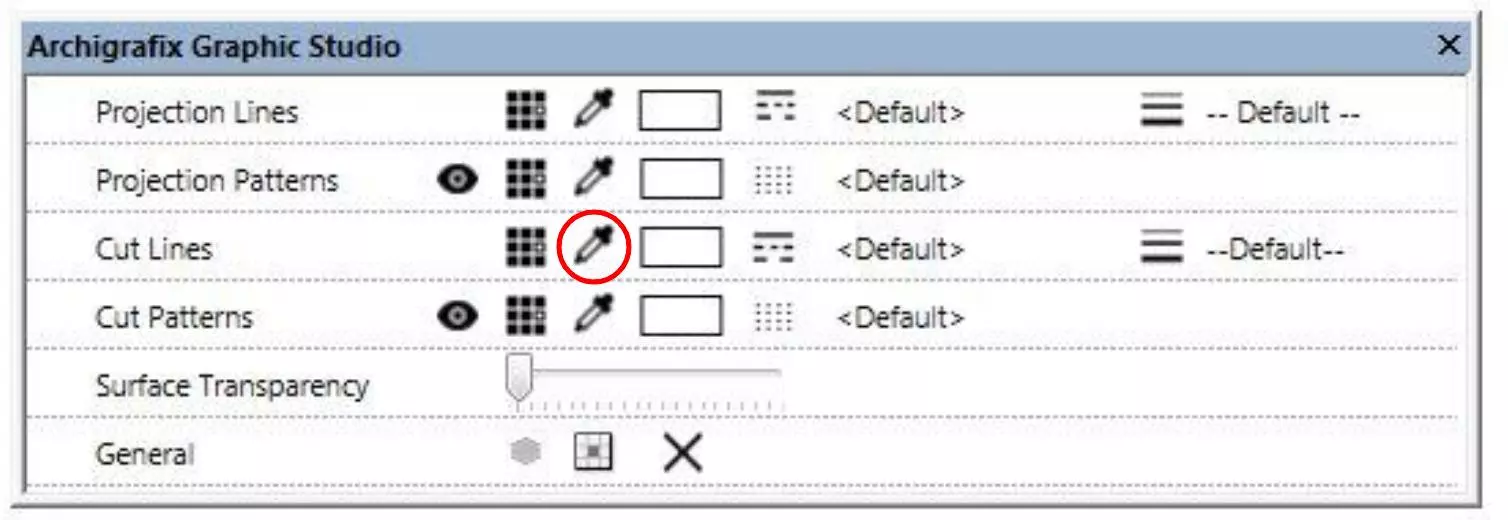
4. Activate the Eyedropper Tool: Navigate to the Graphic Studio's toolbar and click on the eyedropper icon to activate the color picking mode.
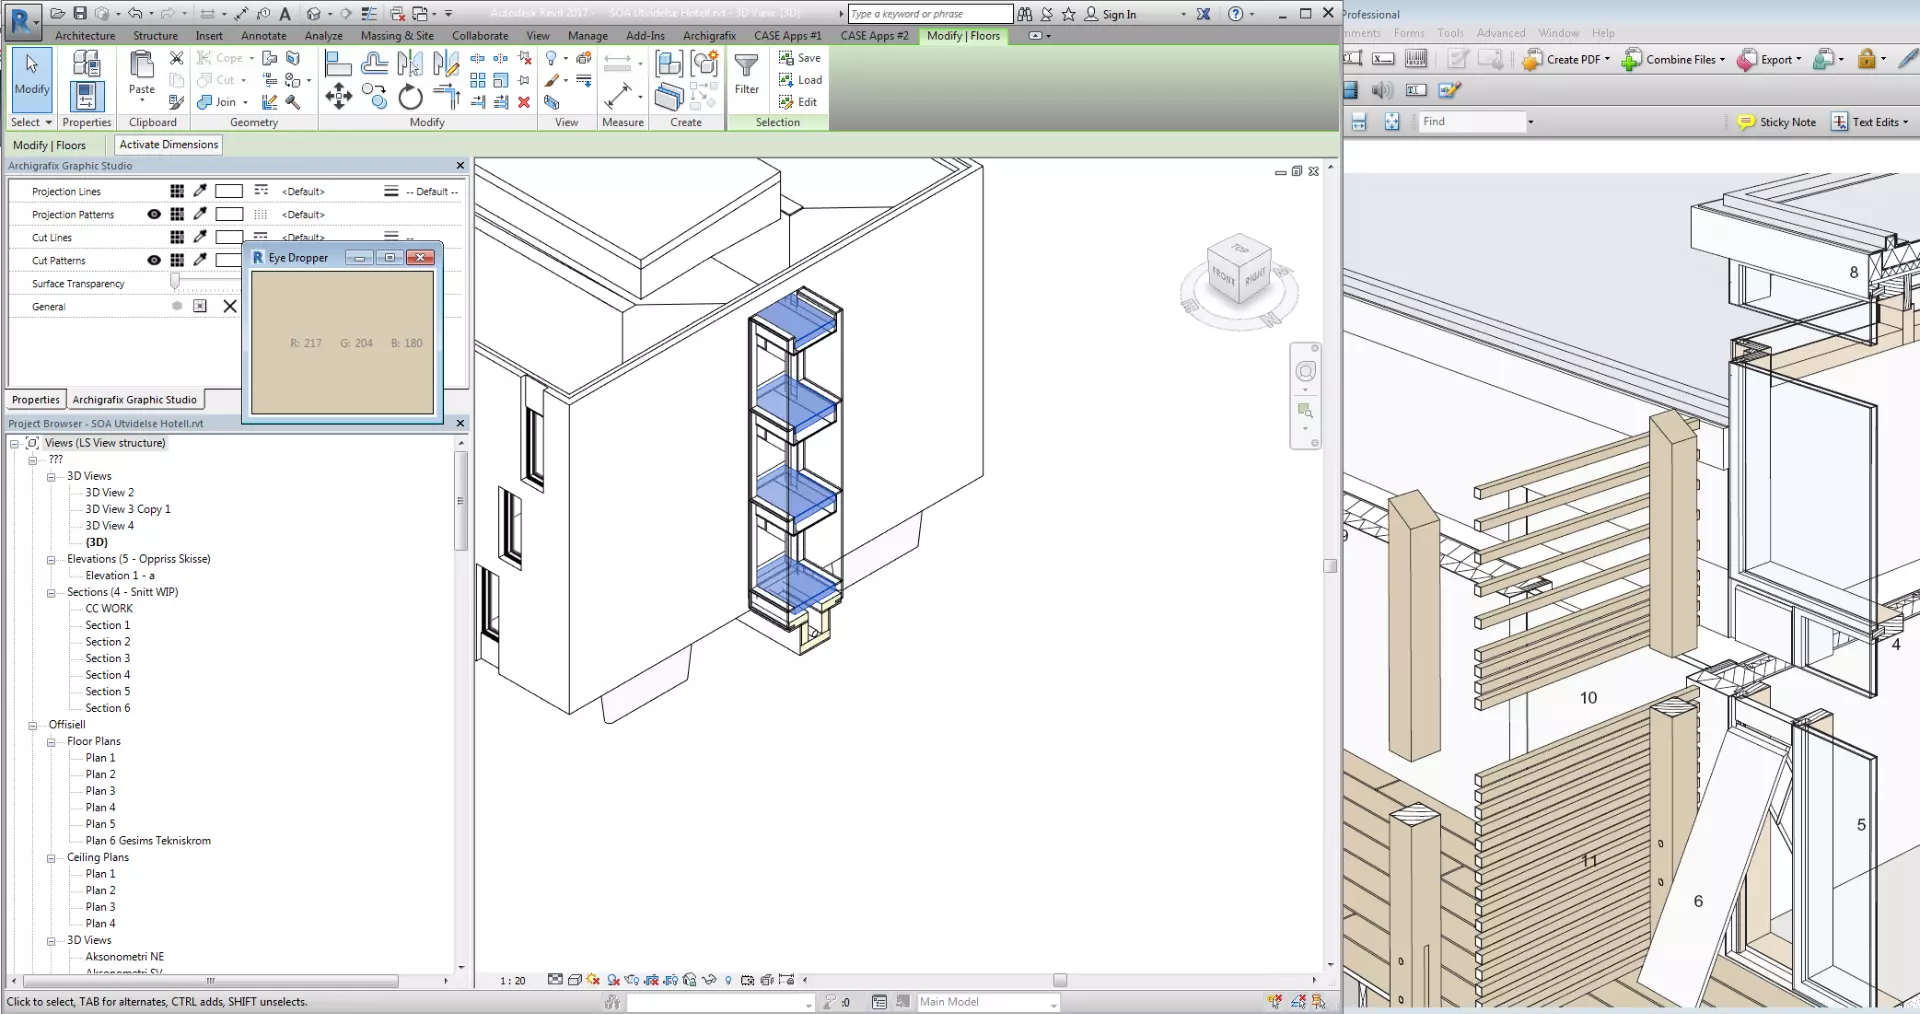
5. Select the Desired Color: With the eyedropper tool activated, you can now select any point on the screen to pick your color. This could be within your Revit project, another application, or even from a document such as a PDF or image. The eyedropper tool will replicate the exact color from the selected point.
6. Override the Color: After picking your color, use it to override the color of your selected lines and surfaces. We have an in-depth tutorial on how to override color in Graphic Studio that you can check out [here].
By following these steps, you can harmonize your design colors, creating a visually pleasing and professional aesthetic.
Wrap Up
There you have it! By using the color eyedropper in combination with Graphic Studio, you've unlocked a new level of design precision. This tool helps you maintain color consistency, significantly enhancing the visual appeal and professionalism of your designs.
The flexibility to pick colors from any point on your screen allows you to create a unique and harmonious color palette that speaks to your project's theme. Whether it's replicating a color from a PDF, an image, or another application, the color eyedropper tool makes it effortless.
In conclusion, mastering this workflow is a powerful step towards creating better, more consistent designs. We're sure that, with a bit of practice, you'll find the color eyedropper an essential part of your design process. So go ahead, start experimenting, and bring your designs to life. Keep designing, keep exploring!

